


The Dusty Attic Chipboard used on this project....

Christmas Tree #2 DA0648

Pots & Columns DA0546

mini wire dress form DA0670

It's beginning to look a lot like Christmas DA0646

Door #1 DA0692

Brick wall panel DA0316

vine boarder DA0459

wire dress form DA0228

vintage frame DA0254

chandelier small 2pack DA0080
I used the Vintage Autumn Basics Collection from Maja Design

From the Vintage Autumn Basics Collection, I used:No.II,No.X-bs,No.I,No.II-BS
Here are some closeups of detail....
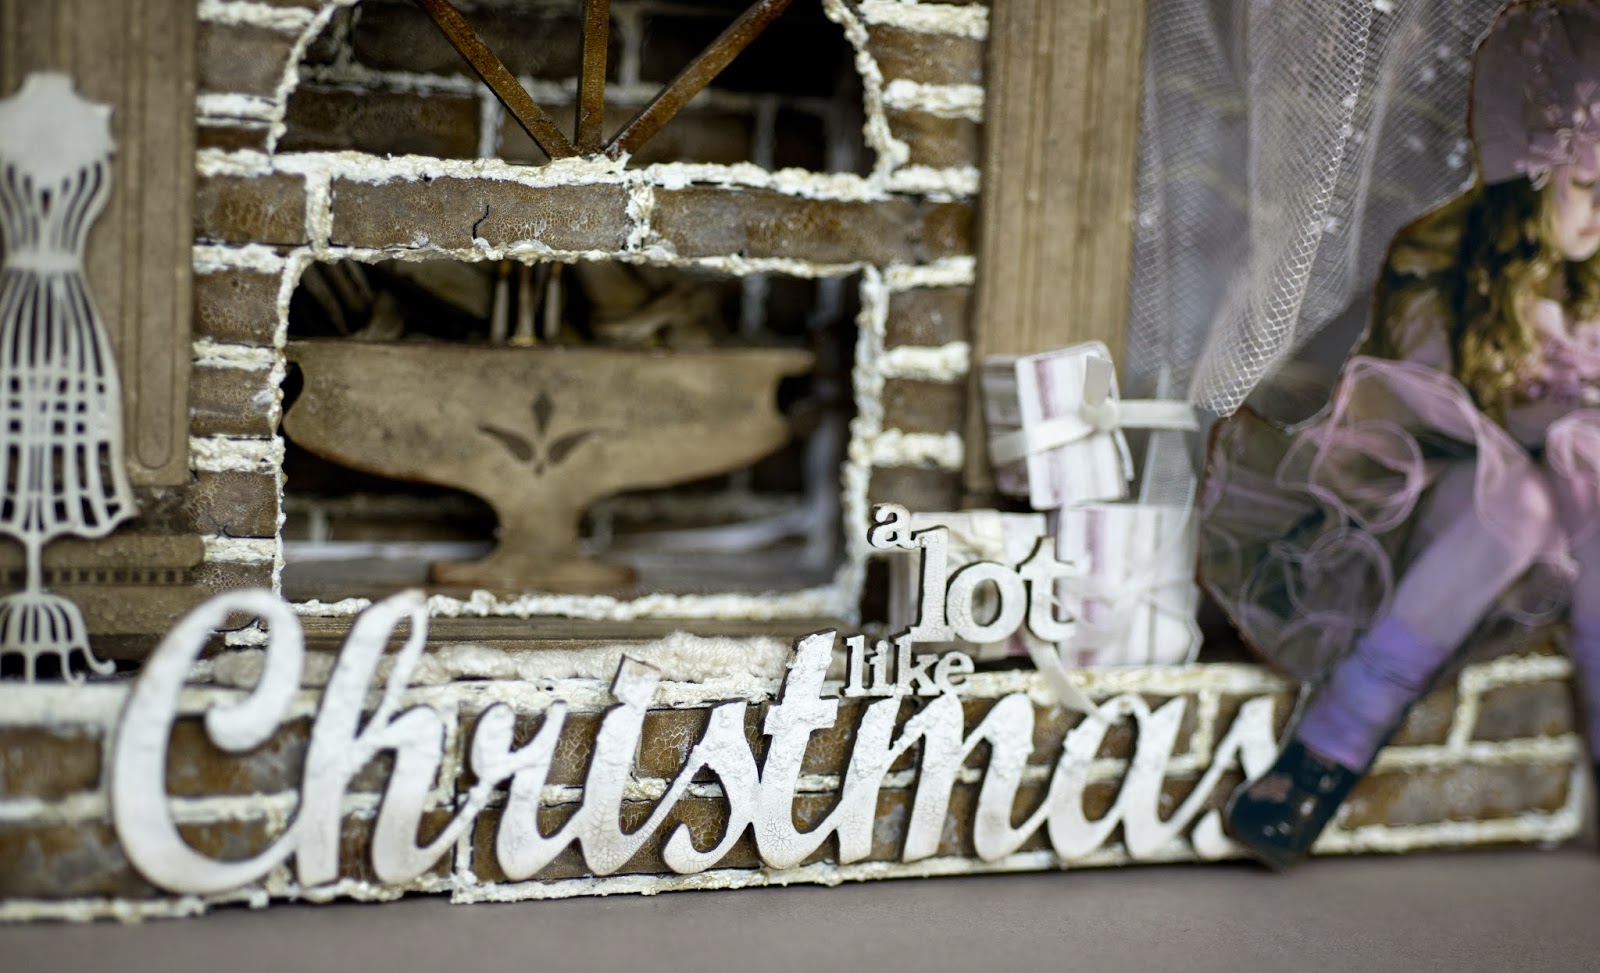
I glued the brick wall panel, on to cardstock. I then stained it with Tim Holtz walnut stain. I then cut out my brick pieces for the fireplace & for the shadow box.The brick wall was easy to cut, without loosing any of the pieces, because of being glued onto the cardstock. I used a cardboard jewelry box, for my frame of the fireplace.I then cut door #1 & glued it to the front. My next step was to glue brick onto the inside & the outside of the fireplace& to the front of the shadow box. I painted all the brick with rock candy crackle & when that dried I rubbed in a light grey chalk.For the mortar I did 2 coats of Martha Stewart texture effects,& once that dried I painted on some platinum liquid pearls....

I raised the floor using corrugated paper,there are 5 layers. With the left over cor paper I cut out little pieces & glued them together,then covered them with scraps of my paper I was using,those are my presents under the tree...

In the cluster's, I used the vine boarder,that I had used a spectrum noir (brown) for the stem. I used white picket fence on the leaves & when they dried I rubbed in a brown chalk & inked the edges. I also used in the clusters Prima's Audrey Collection,some I am Roses,pearls & ribbon....


I did the same to the Vintage frame, as I had to the title.I cut out stockings out of cardstock,then cut out pieces of paper, from the scraps I was working with,inked the edges,glued them onto the cardstock,with also inserting a piece of lace.I also made a banner behind the stockings,out of a string of pearls.I glued a doily & some tulle to the top of the fire place,then added some roses, pearls & bling.I used tattered angels gold on the dress form,then dressed it using ribbon,tulle & bling...


 l
l
On this cluster I added some pearls & bling...


I used the part of the Vintage Frame that I cut off on the upper left corner...

I used white picket fence crackle, on the vase,on the fine detail area of the vase I used liquid pearls (platinum). I then glued in a piece of tulle,added some rose buds,bling & pearls.I had cut the candles off the other chandelier for the fireplace, so I was able to use part of it on this chandelier.On the base,I used the brown spectrum noir (EB&),it is very close to the brown in the Maja papers.I then applied rock candy crackle & rubbed in brown chalk. I painted the candles with LuminArt' Rose Petal & when that dried I applied liquid accents. The flames are gold liquid pearls....

Now for the tree,the pot is made from one of the columns & here is a photo tut I did with Christmas Tree #2

I first dipped all the trees in warm water,then let them sit for a couple minutes so that the water gets adsorbed through out the chipboard.

There are 3 layers to the chipboard, so I peeled back one layer....

I then cut the next two layers into sections & cut the tree trunk off the top 2 layers...

Then I seperated those layers....

Here are your 3 layers....

I painted the bottom layers with gesso & the top layer with picket fence crackle. I also used Martha Stewart white texture effects on the outside edges of the top layer.Once the the paint dried, I glued the layers together,by only using a drop of glue in the center,so that you can lift the edges,to get the dimension.

1st layers glued together...

Top layer glued on. I filled all of those cracks with more texture effects...

Once that dried,I took it out side & sprayed it wit a acrylic sealer,brought it back in & sprinkled transparent glitter over the tree while the sealer was still wet.

I then glued on the seed beads & pearls....

The raw chipboard Tree with the Embellished Tree...
This is how I was able to free stand the tree & the wire form dress

I used those things, you tie up a turkey with. Cut out pieces of chipboard & glued those 3 pieces together...

I the glued another piece of chipboard over top of that. On the dress form I just used the pick & glued it down the center,I wrapped some floss around the 2 pieces to secure them. I was able to do this because I had built up the floor with corrugated paper. I used a paper pierce & poked in a hole where I wanted these pieces to stand...


.png)
outstandingly gorgeous and truly made with love. Now tell us all how long did it take you to make, over how many days or approximately how many hours over what length of time, cuz I know............wink wink
ReplyDeleteThis is exquisite.. so many beautiful details.. love the crisp white colors.. stunning creation...
ReplyDeleteAmazingly beautiful project and your trees are just stunning. Thank you for explaining how you made them.
ReplyDeleteAwesome layout. The tree is amazingly beautiful. So creative and inspiring. Love it so much.
ReplyDeleteOMG, this is stunning! so many details...amazing!!
ReplyDeleteHave just found this and it is one of the most fantastic things I have ever seen. I would really like to try to make the chistmas tree. I wish you a fine day.
ReplyDelete